
Thank you for purchasing a Touchpoint SmartClock!
You are almost ready to use your new device…
Table of Contents (click the topic you want to learn more about)
- Getting to know the Time Clock
- Setting up Your Time Clock
- Accessing Your Kiosk URLs
- Powering on and Connecting to the Network
- Exiting to Windows
- Configure Kiosk Mode
Contacting Support
- Additional Documentation
Getting to Know the Time Clock
Touchpoint Time Clock Lite


Touchpoint Time Clock Standard

PoE to Power the Time Clock (Image Above)
- Connect the PoE Injector Power Supply cable to Y Cable.
- Connect both ends of the Y cable to both ends of the PoE Injector.
- Plug in the ethernet cable from your source to the Ethernet in Port (Labeled “LAN”) on the PoE Injector.
- Run an ethernet cable from the Ethernet & Power Out (Labeled POE) port to the Power Data In port on the PoE Splitter connected to the device.
- The unit will power on.
Kiosk Screen
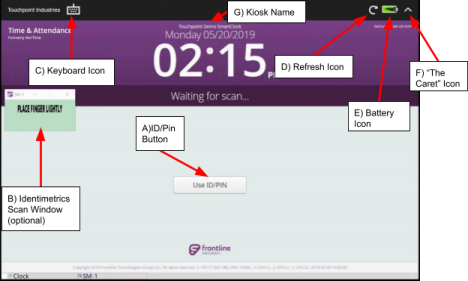
A) ID/ Pin Button: Select this to enter your ID/Pin Manually (May or may not be present depending on your Frontline Kiosk Settings)
B) Identimetrics Scan Window: Only on Biometric (230) Model Timeclocks
C) Keyboard Icon: Select this to bring up the on-screen keyboard
D) Refresh Icon: Select this to refresh the screen
E) Battery Icon: This indicates the SmartClock’s battery level and whether or not it is currently charging
F) “The Caret” Icon: Select this to re-launch the Identimetrics Scan Window if it is not currently presented on the screen.
G) Kiosk Name: This can be changed in your Frontline “Clock Kiosk” settings.
Setting up the Time Clock
Accessing Kiosk URLs
Log into the Frontline Time & Attendance portal: https://time.frontlineeducation.com/
If you do not have a username and password, someone in your business office, payroll, or human resources may be able to help get the URLs for you.
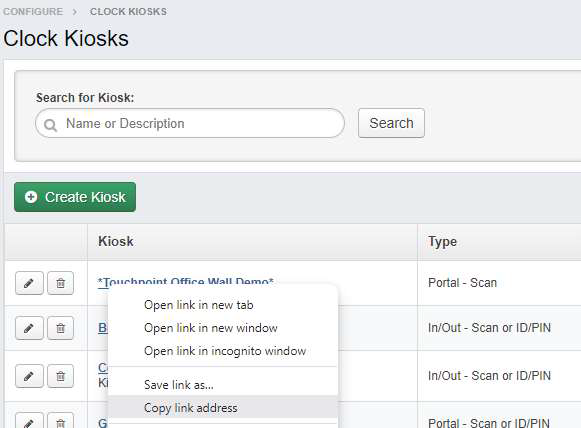
Click Configure on the left-hand side, then choose Clock Kiosks.

Right-click the Kiosk you want the URL for and choose Copy Link Address.
Each clock will have a unique URL (ORGID will be the same for all clocks in your district) (KID will be different for each clock)
If you choose, you can also assign a location for the clock in the Time and Attendance portal. This will display above the date/time when in Kiosk Mode.
Powering on and Connecting to the Network
- Connect Power Cord to Power Cord Input - The unit will power on
- Connect Ethernet Cord to Ethernet Cord Input
- Clocks can use DHCP or static address
- Add a WiFi connection
- Click the icon on the desktop “Wi-Fi Settings” for settings.
* The Time Clock Standard model has an option for 4G backup service if the clock would lose connection to the district network - Please note this is a backup option only and is limited to 50MB per calendar month. 4G service is only available while the devices are covered under the Whiteglove Service and Support.
Exiting to Windows
If it is the first time turning on the Timeclock, you may see this screen:

If you have previously set up the clock, you may see the Timeclock Kiosk screen:

- Starting in the upper left and going clockwise, touch all four corners of the screen
- Click on the Keyboard to bring up the Keyboard
- Enter password “1492” and click OK

- Touch and slide up anywhere on the screen to reveal the Windows Login Page
- Select the Touchpoint user at the bottom left of the screen

- Click Sign in

You have now successfully accessed the Windows screen
Configure Kiosk Mode
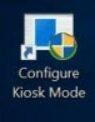
Choose the “Configure Kiosk Mode” icon in the upper left corner of the desktop.
Make sure you are in the “General” section:
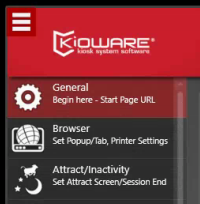
This section is where you will enter the Kiosk URL from the earlier step.
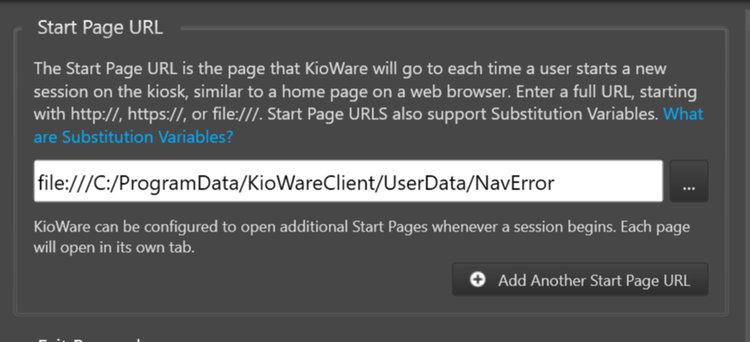
Tap in this field and delete all the text so the field is blank. To bring up the keyboard, click the keyboard icon on the bottom right corner of the screen.
Enter the Kiosk URL for this time clock.
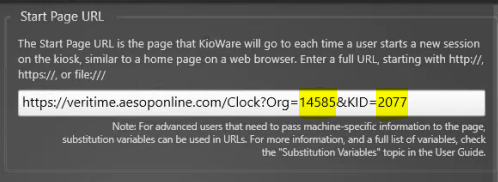
Ensure the ORG ID and the KID highlighted above are for your district and clock, so your clock can access the right Frontline account.
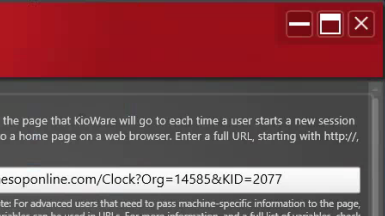
To save the settings, simply exit the Kioware app by clicking the “X” at the top right of the page.
Restart the time clock to enter kiosk mode. Select the “Start Kiosk Mode” icon in the upper left corner of the desktop.

The device will power cycle and reboot into the Frontline Kiosk Mode for you to begin clocking in!
That's it! When you see a screen similar to this one, you have successfully entered Kiosk Mode.

Congratulations on successfully setting up your Touchpoint Time Clock!
Contacting Support
Email support@touchpointk12.com to open a support ticket which allows our support team to assist you in the most efficient way possible.
- Please be sure to include the clock ID, which is listed on a white sticker on the bottom of your clock (ie. districtname-#)
Touchpoint does not have access to the district’s Frontline account.
- Any Frontline specific questions can be directed to support@frontlineed.com
- Frontline Time and Attendance Learning Center
- Frontline Time and Attendance Portal
Additional Documentation
Wall Mount Installation Instructions
What you will need:

Step 1-A: Concrete/Dry-Wall Installation

Step 1-B: Wood Stud Installation

Step 2: Hang the Kiosk on the Wall Plate

White Glove Service and Remote-In Support
Click HERE for a link to the Touchpoint White Glove Service and Remote-In Support document
LogMeIn
LogMeIn Central is Touchpoint's monitoring software to provide remote technical support, monitor for potential issues, and apply updates and proactive support. Click HERE for a link to the Whitelisting and Remote Support document regarding LogMeIn Central access.